Revolve takes a nurbs curve, spins it kind of like pottery, and makes a complete 360 degree object.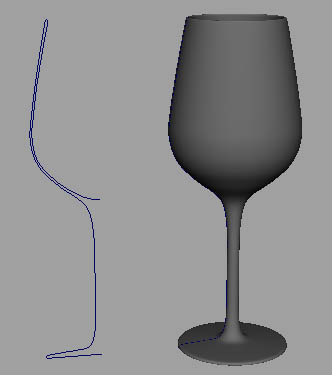
Set-up
Set the menu set to surfaces.Make sure you're familiar with basic nurbs curves and basic polygons.
Creating The Profile Curve
This is the profile of whatever object you're making. In this tutorial we're making a glass.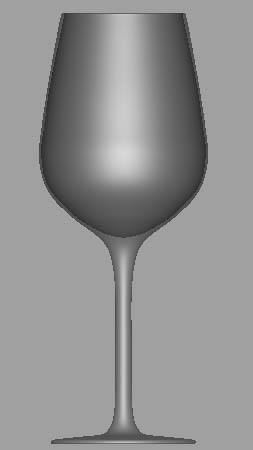
Profile curves are made with nurb curves.
Step one - Go to create>CV curve tool.
Step two - Create the profile of the glass on one side.
Step three - By default the pivot point will be set to the center of the scene. Since the pivot point is the point at which the revolve function will revolve the surface around, it's important that it sits in the right place. In this case, it is in the center of the scene (origin). MORE

Custom Search
free Maya modeling tutorial : Using Revolve
free Maya modeling tutorial : Creating End Tables
This tutorial covers basic polygonal primitives modeling with bevels.
set-up
Set the menu set to polygons.Make sure you're familiar with the move and scale tools.To create a polygonal object primitive go to create>polygon primitives>..
Modeling
Step one - Create a cube and scale it so it's the same size as the cube in the image below. 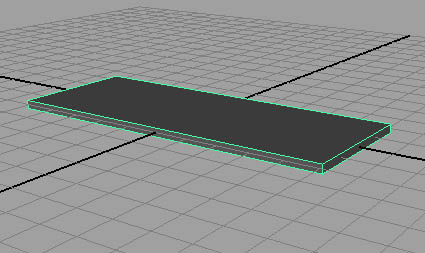
Step two - Right click on the model and go to edge component mode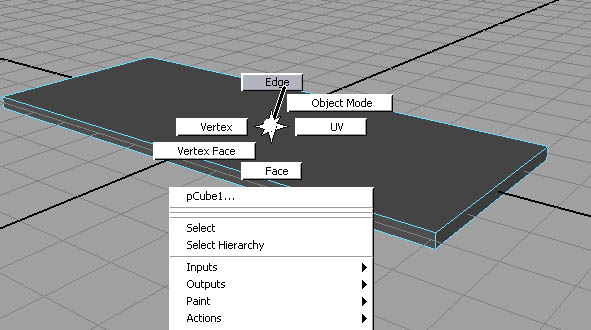
Step three - Select the vertical edges on the corners.<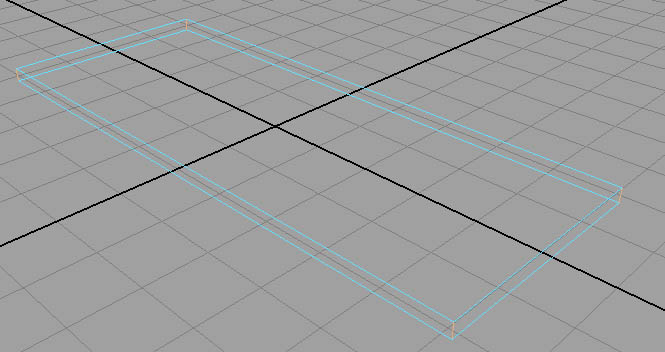
These will be the corners we bevel. MORE
free Maya tutorials: Chain gun in Maya tutorial
Written by Dzordz
Thursday, 21 December 2006
Page 1 of 3
In this tutorial I’ll show you how to model a chain gun and control rig for firing and aiming using basic MEL scripts.
First we will create base. Create Linear CV curve.
Then go to surfaces/revolve option box, set y for axis.
Revolved surface will look like this
Create upper parts, using same tool
Then from side view create one linear curve, that has same start and end point (use curve snapping or c key+mmb drag)
Then go to revolve option box, but set angle to 10.
This will create only 10 degrees out of circle.
MORE
free maya tutorials : Baking Ambient Occlusion Using Mental Ray
Written by Dzordz
Saturday, 10 February 2007
Page 1 of 2
Ambient occlusion can be very useful for adding details to shadows of your images.
But also it can be extremely expensive to calculate for every frame of your animation.
Ambient occlusion can be very useful for adding details to shadows of your images.
But also it can be extremely expensive to calculate for every frame of your animation.
If you have scene that is very static (camera flying trough environment), you can render ambient occlusion to texture and assign that texture to ambient attribute of your shaders. That way the scene will render very fast.
Before entering this tutorial I recommend you to read my tutorial for making lava shader, to get basic knowledge about hypershade and texturing in Maya.
In our example I modeled simple terrain using poly plane and one bridge going across. I also added one directional light (sunlight).
For texturing I used Photoshop. Here’s one very useful tip if you are going to use Photoshop for texturing. Assign lambert to plane (ground plane) and go to hypershade. Select plane and lambert you just assigned to it. Then in hypershade menu go to edit/convert to file texture (Maya software). Set bake shading group lighting. This will bake illumination to texture. Also surface shader is created and assigned to object. Delete that surface shader, and assign lambert to plane. Baked texture is located in sourceimages subfolder of your project. MORE
Subscribe to:
Posts (Atom)
|
|
|


