
Custom Search
LightWave Effects tutorials
Blast off with Hypervoxels 2.0

Since LightWave 3.5 I’ve known how to create a really nice overcast sky using two polygons with an offset fractal noise pattern (Figure 1), but even though I could create nice rolling thunderstorm type clouds, they just weren’t 'puffy' enough. When I upgraded to LightWave 5.0, I was excited about the Metaball function. With this feature I thought I could create some really fantastic puffy clouds. While I could create the shape of a puffy cloud it just wasn’t believable enough. With LW5.5 came Steamer. 'Oh boy, now we can create cool clouds!' But alas, back to a semi-flat looking skyscape. With LW5.6 came Hypervoxels 1.0, a cool plaything for flowing effects like blood and thick water, but no puffy clouds...GO
Camera Zoom

While working on some routines for Visual FX for Image FX, I decided to try one of them through Lightwave as well. This article is about that routine. If you have ever seen a documentary on TV you have seen this effect. They use it ALL the time. The one I am talking about is when they show an old photo and then zoom in on one section or one person in the picture...GO
Colorfull refractions

Inspired by the prism tutorial from lw-fin.org i was thinking about how to achieve such an effect with hdri. since i wasn't keen on the lighting, just the refraction part was interesting for me, i started to do some tests. and it was a little surprise that i found different ways to use a hdr image and that my technique works well for 'common' lighting setups as well. touching this interesting phenomenon caused a nearly complete research about color/light theory and conversions between different color models...GO
Compositing

3D compositing can be extremely challenging but at the same time, very rewarding. Unfortunely, one of the difficult parts of compositing is to create a format that is usable in a variety of editing environments. Lightwave's alpha channel is an exellent way to do this even if making a "perfect alpha" is quite tricky. The problem with alpha channels is that when an image is rendered using motion blur, DOF or even anti-alias, whatever background information was used during the render, the edges will contain color portions of that because of the way that render passes are mixed together. Another difficulty is casting shadows onto a background image without damaging the background. Here, we will explore the basics of compositing and specifically look at how to create shadows and matte objects that don't interfere with the composited image...GO
Camera Zoom
While working on some routines for Visual FX for Image FX, I decided to try one of them through Lightwave as well. This article is about that routine. If you have ever seen a documentary on TV you have seen this effect. They use it ALL the time. The one I am talking about is when they show an old photo and then zoom in on one section or one person in the picture...GO
Colorfull refractions
Inspired by the prism tutorial from lw-fin.org i was thinking about how to achieve such an effect with hdri. since i wasn't keen on the lighting, just the refraction part was interesting for me, i started to do some tests. and it was a little surprise that i found different ways to use a hdr image and that my technique works well for 'common' lighting setups as well. touching this interesting phenomenon caused a nearly complete research about color/light theory and conversions between different color models...GO
Compositing
3D compositing can be extremely challenging but at the same time, very rewarding. Unfortunely, one of the difficult parts of compositing is to create a format that is usable in a variety of editing environments. Lightwave's alpha channel is an exellent way to do this even if making a "perfect alpha" is quite tricky. The problem with alpha channels is that when an image is rendered using motion blur, DOF or even anti-alias, whatever background information was used during the render, the edges will contain color portions of that because of the way that render passes are mixed together. Another difficulty is casting shadows onto a background image without damaging the background. Here, we will explore the basics of compositing and specifically look at how to create shadows and matte objects that don't interfere with the composited image...GO
LightWave Materials/Textures tutorials
Nice looking glass

Fresh with the lightwave 7.5b update, newtek gave us a new gradient function called 'thickness'. since i prefer to work with gradients instead of plugins i started to play with this function to create nice looking glass. to speed up the things a little bit, i won't use lights, just a hdri as reflection/refraction enviroment...GO
LightWave Modeling tutorials
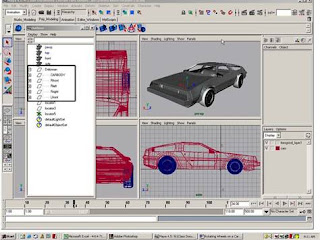
Car Modeling

This tutorial is suitable for beginners to intermediate users of Lightwave 3d and I'm assuming that the basic knowledge from the software is at your hand. Before starting with this tutorial i recommend using POZ Extender plugin which you can download at Flay.com, this version is a non-looping extender which eliminates those unwanted back faces...GO
Basic Head Modeling (video tutorial)

In this series of tutorials Philip is showing an interesting approach on modeling a head; first a relatively low-poly head is modeled which can then be detailed and characterized to become pretty much every (human) head you like. These free parts show you how to model this prototype, and we'll continue in the VIP area by detailing and UV-mapping and creating a basic texture...GO
Creating a Spider Web with Lightwave 3D
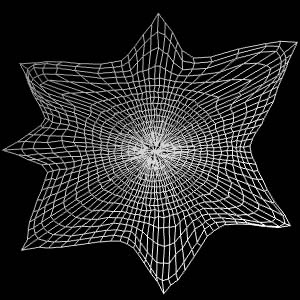
Modeling a spider web is one of those tasks that can be extremely tedious. But, it can be very simple if you use the right techniques. In this tutorial, we'll use several of Lightwave's time-saving tools to accomplish this task in just ten easy steps...GO
Basic Head Modeling (video tutorial)
In this series of tutorials Philip is showing an interesting approach on modeling a head; first a relatively low-poly head is modeled which can then be detailed and characterized to become pretty much every (human) head you like. These free parts show you how to model this prototype, and we'll continue in the VIP area by detailing and UV-mapping and creating a basic texture...GO
Creating a Spider Web with Lightwave 3D
Modeling a spider web is one of those tasks that can be extremely tedious. But, it can be very simple if you use the right techniques. In this tutorial, we'll use several of Lightwave's time-saving tools to accomplish this task in just ten easy steps...GO
LightWave Animation tutorials
Bouncing Ball In LightWave 3D Tutorial

Begin by creating a sphere about 2.5 meters in diameter, like the one shown here. Make sure it has a surface name like "ball" (press "q" in Modeler). Next, add a "Null" as shown*. When you are asked to name the null, call it "Ball_Controller"...GO
How to create a crowd of Bipeds in Lightwave 3D

Handling an army of UFO's is one thing, but things become complicated when you want to handle a mass of Bipeds which on top of that are animated !! In this tutorial we're going to see how to create a crowd of Bipeds in Lightwave 3D (version 6.5 upwards). The subject is a crowd carrying out a linear movement on a flat plane. I used this technique to create a crowd of 500 soldiers in the first trailer of Star Ancetor. In fact its more of a trick than a real crowd simulation, therefore, no question of recreating the crowds of "Retour du Roi" (Return of the King) or even the army of Anubis in "le Retour de la Momie" :) (The return of The Mummy). Here are the different steps invloved...GO
Blender Modeling tutorials
Blender - Landscapes Tutorial

Purpose : quickly model complex outdoor landscapes within Blender, without messing with specific tools like Bryce or Terragen. We'll work on the basis of Height Maps, exactly as do these two softwares.
Level : intermediate. C-Key needed for the fourth part...GOA Simple Winter Scene
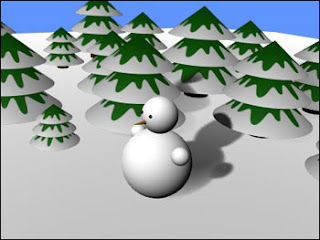
This tutorial will teach you how to make a simple winter scene, including some fir trees and a snowman. It is supposed to show you how to use the most common Blender functionalities (i.e. modelling, adding materials and textures) and shortcuts...Go
Creating Pixar-looking eyes in Blender
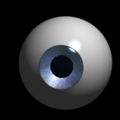
The goal of this tutorial is to make a Pixar-looking eye. One of the main reasons that Pixar's characters really convey life is in their eyes. They have depth, you can see how the eye not only shines but it "collects" light. You may think that you can't achieve this effect without raytracing but you're wrong. The secret of this depth is in the modelling of the eye. Lets see how it works!...GO
Building a Spiral Stair
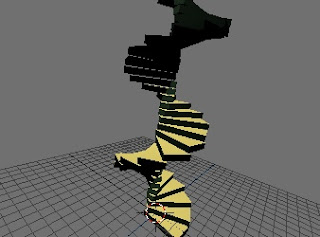
Building a Spiral Stair
One of Blender's features is its ability to use animations as a tool for modeling. Strange as this may sound, it is often a very powerful technique. In this tutorial I describe building a spiral stair. Using traditional methods, this would require many steps to model, but once you grasp how a moving object can represent the final result, it becomes a lot easier...GO
Modelling Bongo
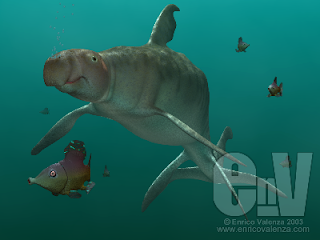
Who or what is Bongo? Just a fantasy creature we are going to model for this tutorial with the Subdivision Surface technique. By the way, we can say that Bongo is a mammalian which lives in water, as a dolphin and the walrus, and this can be enough: because it is a non-existing creature, we can begin to model following our inspiration...GO
Modelling Bongo
Who or what is Bongo? Just a fantasy creature we are going to model for this tutorial with the Subdivision Surface technique. By the way, we can say that Bongo is a mammalian which lives in water, as a dolphin and the walrus, and this can be enough: because it is a non-existing creature, we can begin to model following our inspiration...GO
CINEMA 4D Modeling tutorials
Create A Car Tyre Tutorial

You will need the MAKETHICKER plugin, download and drop it into program files/maxon/cinema 4d/plugins, you can find the plugin at the following page...GO
Rhino Modeling tutorials
Modeling Vegetation

To start the model we will draw a set of 4 profile splines to model the stem, or trunk.The type of splines that we will use on this project will be interpolated curves. We will use interpolated curves because they are smooth and flowing. The second style of curve, the polyline, is not flowing and has jagged edges...GO
The virtual reality
Vrml worlds from avatara.com
Avatara's Home @ Pointworlds.
This world contains links to most of Avatara's worlds. Originally built by Lunatic interactive as part of the original Pointworld series of worlds, it was converted to VRML2.0 with the other Pointworld Worlds as a central linking location for many of the best VR builders.
You must install a VRML plugin to see these 3D interactive worlds.
Bryce Lighting tutorials
Streaming Light Rays

Bryce 4 has an additional option in the light editor called Ranged Falloff. In the manual the only mention of it appears to be on Page 363 where it says "Ranged Falloff causes the light to change abruptly from full intensity to zero (no illumination) after a defined distance range." There is no mention of how you define the distance range. This tutorial attempts to explain the use of this option with respect to streaming light rays through a window.To follow this tutorial you should set up a scene as in the first Streaming Light Rays tutorial but select Ranged Falloff instead of Linear Falloff or Squared Falloff...GO
Bryce Modeling tutorials
HOW TO PRODUCE FRUITS WITH TREE LAB

The new Bryce 5 Tree Lab is a great feature for making all four essential components of a tree: tree overall shape, tree trunk, tree branches and tree foliage. Now we are going to add a fifth component (with some limitations) - Tree Fruits. The secret formula is ... to substitute branches and trunks with forms and textures imitating Fruits!
All 3D images are straight out of Bryce 5 with no post work or image processing...GOBoolean Modelling Tutorial

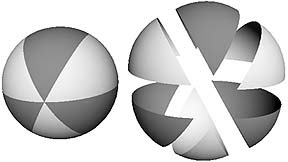
This tutorial will go about the basics of boolean modeling which will teach you to create some interesting shapes and renders.
Create a sphere and select it. Click that "A"-box near object and transfer object to positive boolean...GO
Bryce Animation tutorials
Keyframe Animation
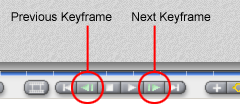
This tutorial gives a basic introduction to keyframe animation in Bryce. The tutorial is compatible with Bryce 4 and 5 but may work with earlier versions although I haven't tested this.
If you are new to animation or if you are a Bryce novice, I suggest you work through the tutorial from start to finish. Use the examples given in order to gain a good understanding of the concepts before embarking on your own project. If you are a more experienced user, you may just want to look at the FastTrack section below and then have a go on your own. You can always refer to specific steps in the main tutorial if you get stuck. The tutorial should be easy to follow but it is quite long and you should give yourself enough time to get through it at your own pace. Don't rush it...GO
If you are new to animation or if you are a Bryce novice, I suggest you work through the tutorial from start to finish. Use the examples given in order to gain a good understanding of the concepts before embarking on your own project. If you are a more experienced user, you may just want to look at the FastTrack section below and then have a go on your own. You can always refer to specific steps in the main tutorial if you get stuck. The tutorial should be easy to follow but it is quite long and you should give yourself enough time to get through it at your own pace. Don't rush it...GO
Animating Ocean Waves
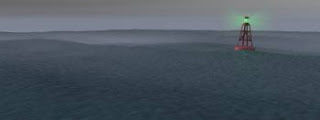
Start with a new scene file in Bryce. Go to the File menu and select Animation Setup. Create an animation 8 seconds long at 15 frames per second. Create a terrain and click on the [A] icon to enter the Object Attributes box. For the Size coordinates, enter values of X=1000, Y=25, Z=1000. You can adjust the height of the terrain to range from large stormy waves to low peaceful waves. Leave the Attributes box and click on the [E] icon to enter the Terrain Editor...GO
Simple Comets
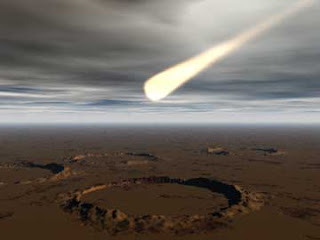
Create a round parallel light by holding down the Control key and clicking on Parallel Light (the default parallel light is square and that won't work in this application)...GO
Simple Comets
Create a round parallel light by holding down the Control key and clicking on Parallel Light (the default parallel light is square and that won't work in this application)...GO
Maya Rendering tutorials
Render Globals (Video tutorial)

This is one of the most frequently asked questions at Simply Maya:
Q. How do I render a movie?A. Here you go... Mike will show you how. This is a tutorial will have you making movies in no time!...GO
Using the RGB + Alpha Channels to speed up the rendering times in Maya

Render Passes for Maya - Tutorial

Batch Rendering Multiple Maya Files

Suppose you have animated your heart out and you are ready to render. The only problem is that you have sixteen million scenes with three camera changes each. That's a lot of rendering especially if you don't have an render farm at your disposal! You could stay up all night baby-sitting your machine but there is a easier way. Batch command rendering! In this tutorial, I give a few examples of simple batch commands using a text editor such as Window's Notepad to write a series of instructions for rendering non-stop scene files...GO
Using the RGB + Alpha Channels to speed up the rendering times in Maya
This lesson shows you how to use the RGB and Alpha channels of an image to your advantage. In this lesson we’ll go over how to store textures inside an RGB image so only a few images need to be loaded in Maya come rendering time. You can use these channels to store any black and white images you need...GO
Render Passes for Maya - Tutorial
This is a very simple tutorial to lead you through the steps involved in setting up a scene to use Render Passes. The pass created here will not be useful for anything, but it will give you an idea of how to go about creating whatever passes you need...GO
Batch Rendering Multiple Maya Files
Suppose you have animated your heart out and you are ready to render. The only problem is that you have sixteen million scenes with three camera changes each. That's a lot of rendering especially if you don't have an render farm at your disposal! You could stay up all night baby-sitting your machine but there is a easier way. Batch command rendering! In this tutorial, I give a few examples of simple batch commands using a text editor such as Window's Notepad to write a series of instructions for rendering non-stop scene files...GO
Maya Effects tutorials
Candle flame

To generate a realistic candle flame, the first thing to do, of course, is to light a candle and stare at it. What should become evident are some of the behavioral and visual elements which define its appearance. In terms of Maya lingo, a flame looks more like a transparent, incandescent surface than a nebulous object made out of thousands of particles. Flames have feathered yet hard edges, a very smoothly gradated interior, varying transparency and fluid behavior more akin to liquid or fabric than gas...GO
Particle Emission when Objects Collide

A commonly needed effect is the emission of particles at the exact location of object collision. For example, as a sword scrapes along a wall we may need sparks; As a boulder rolls down a mountainside we may need smaller instanced rocks and pebbles to appear; As a character walks along a dirtroad we would expect dust to appear at his feet...GOParticle Emission when Objects Collide
Maya Materials/Textures tutorials
Cartoon Shading in Maya

This is a step-by-step guide to getting contour shading to work in Maya , composed from several sources, such as the Highend3D Maya + MentalRay forum, not to mention several painful hours in front of my machine! Please contribute any additional insights, clarifications or suggestions. So, without further ado, let's get cracking...GO
Maya Lighting tutorials
Faking Global Illumination with point lights
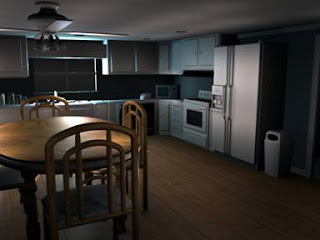
This handout will explain how to use point lights to light a scene and give it the same look as using global illumination. The overall quality is similar, it is easier to do, and best of all, it renders faster. I used a night time kitchen scene from a short film I am working on to create this handout...GO
Lighting flat objects
Creating a Desk Lamp
Improve Maya Shadow Quality
Spotlight Decay Regions
All lights in Maya (area light excluded) emanate light from a finite point in space. This is completely unnatural as all lights in nature have a measurable size. The effect that light size has in nature is found in the shadow and specular qualities present. Simulating this issue in a render is for a separate discussion, as we are now going to focus on a particular situation where the finite origin of a spotlight becomes problematic... not in how objects receive light, but how one controls the origin of light...GO
Lighting flat objects
You certainly know about the way some productions or real-time application use billboards to render distant objects such as trees or signs etc... As long as the camera stays close to facing the boards they can be quite ok. Crossed billboards are often used for trees, or even a slightly more detailed « cutout » billboard so you can have it cast shadows that don't look too bad...GO
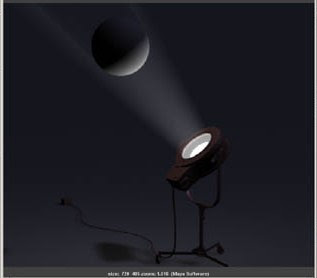
Creating a Desk Lamp
In this tutorial, we will make a desk lamp using Light Intensity Curves, Light Fog, Double-Sided Shading and Shader Glow...GO
Improve Maya Shadow Quality
When using depth map shadows, the map resolution is very important to the quality of the shadow. Sometimes, when your spotlight has a very wide cone angle, the map resolution will not be large enough to cover the entire angle with decent quality results. The image below shows an example of this problem...GO
Spotlight Decay Regions
All lights in Maya (area light excluded) emanate light from a finite point in space. This is completely unnatural as all lights in nature have a measurable size. The effect that light size has in nature is found in the shadow and specular qualities present. Simulating this issue in a render is for a separate discussion, as we are now going to focus on a particular situation where the finite origin of a spotlight becomes problematic... not in how objects receive light, but how one controls the origin of light...GO
Maya Modeling tutorials
Maya: Introduction to Modeling
Curves are spline line segments controlled by CVs. Curves are the framework of shapes. CVs (or control vertices) are the points which control and make up the line curve. These lines are called NURBS (non-uniform rational b-splines). NURBS are special because they form smooth curves between CVs...GO
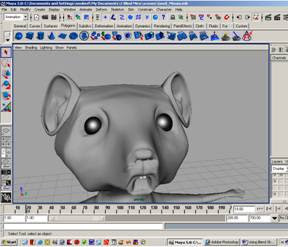
Realistic Eye Modeling for 3D Characters
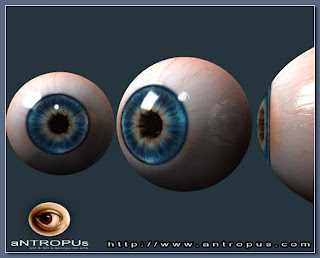
I'm posting a very simple tutorial on how to model and apply shaders to get realistic eyes, the "windows of your character's soul". A lot of times, bad eyes can "kill" your character literally, even if it has the most perfect modeling of the world. The importance of the eyes is exactly this: give life to your character. Therefore, don't underestimate this very important step of CG character construction... if not, you've only created "puppets" ...GO
Ford Focus Tutorial Series
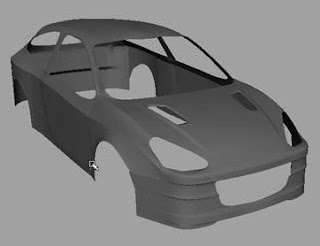
Ford Focus Tutorial Series
1. Create a polygon cube and set the subdivisions along height to 15 and along width to 5. Then scale it so it fits exactly one half of the car.
2. Delete the side faces so that when we mirror and convert to Sub-D later we will not get any problems...GO
Make a screw-driver and render it with FG (Final Gather)
This tutorial explains the process of creating a diamond model in 3d. The software used is Maya. But you can use any 3d applications to follow the steps...GO
Modeling of A Gear
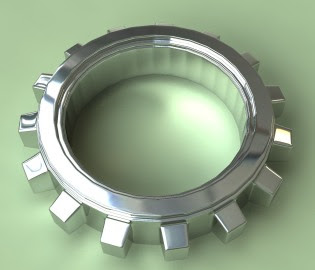
This tutorial is primarially focused on rendering. It will teach; Final gather with metal ray, DGS shaders, basic polygon modelling methods, Depth of field. You will need; Mental Ray, an HDRI map, and Maya...GO
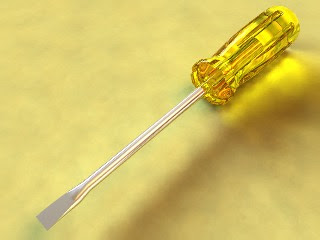
Make a screw-driver and render it with FG (Final Gather)
This is a basic modelling tutorial that will teach you how to make a screw-driver and render it with FG (Final Gather) With global illumination, HDRI (High dynamic ranged imagery) And DoF (Depth of field, optional). First off you will need an HDRI map (I will explain this in a moment)...GO
Simple Method of Creating a Diamond in Maya
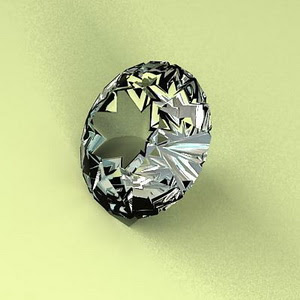
Simple Method of Creating a Diamond in Maya
This tutorial explains the process of creating a diamond model in 3d. The software used is Maya. But you can use any 3d applications to follow the steps...GO
Modeling of A Gear
This tutorial is primarially focused on rendering. It will teach; Final gather with metal ray, DGS shaders, basic polygon modelling methods, Depth of field. You will need; Mental Ray, an HDRI map, and Maya...GO
Maya Animation tutorials
MAYA Tutorial - Basics of Animation

In animation, there's more to animate than simple movement. Animation requires thinking about motion, timing, and smoothness of action. Almost anything in Maya with a number attached to it can be animated. Maya simplifies your work in creating the essence of animation---timing and motion. With maya , you can animate virtually anything you can imagine, no matter how surreal.
- Animation Control and Interface- Terms in Animation
- Animation Types
- Graph Editor...GO
Rotating Wheels on a Car
The purpose of this handout is to show you how to rotate the wheels on a car so they follow the pace of the car as it move. By doing it this way, you will get a more accurate result without setting numerous keyframes. To do this, we will use the distance tool, set driven key, and infinity cycles in the graph editor...GO
Chain gun in Maya tutorial
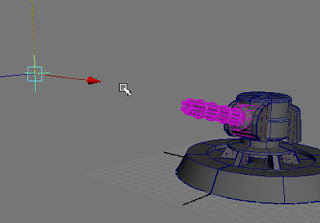
Go to animation mode, select locator and the group and go to constraints/aim constraint option box. Set aim axis to the direction your gun is pointing at (in my case it was Z), and set only on X axis. This way gun will aim only up and down...GO
Creating a spaceship fleet using particle instance
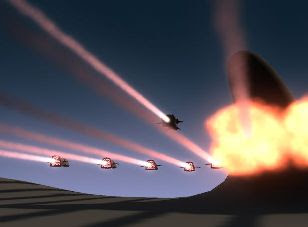
Particles are one of greatest features in Maya. In this tutorial I’m going to show you how to use particle instancer to create fleet of spaceships flying across the planes. Also I’m going to show you how to use events to crash spaceship...GO
Fast Puffy Type Explosions in Maya
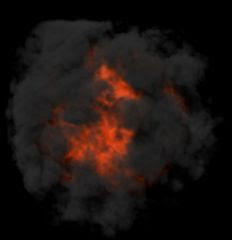
This tutorial will show how to make simple puffy explosion using fluids in Maya. It will explode and then give off black smoke...GO
A Simple Method for creating Walk Cycles
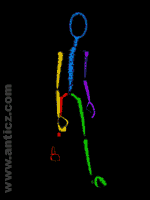
Animating a walk, where do we begin. Well first we need a character. For today's lesson we're going to use Mr.Stickman. Next we need a clear and simple method of approaching walks in general. I didn't come up with the technique that follows...GO
Using Blend Shape for Facial Expressions
In this file we will go over using blend shape for facial expressions. This is an extremely easy and effective way to enhance you animations.
First we want to duplicate the mouse once for each expression or partial expression you want. This depends on how much you want to control the face. You can have a head sculpted for individual expressions (I.E. happy, sad, angry, etc.), or you could have a duplicated head for individual body parts, which you can combine for more detailed expressions (I.E. raised eye brow, smile, from, grin, lowered brow, etc.). For this example I will simply sculpt a few individual body part expressions. Two for the eyes (open and squint) and two for the mouth (open and smile), which I can combine to get different facial expressions...GO
Animating Tank Treads
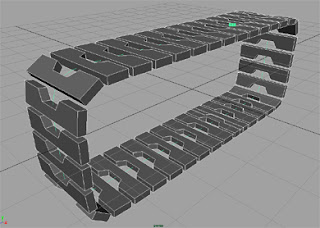
A Tutorial in creating a moving belt using path animation.This tutorial can also be applied to any animation that involves a moving belt. For Example: an esculator, conveyer belt, luggage carousel at an airport, or even belts on an engine. Let's begin...GO
3D Studio Max Rendering tutorials
Rendering

After completing a particular scene or animation you will probably want to distribute your work in some way. There are several Render options available in 3D Studio Max, although some are not as obvious as others. The following goes through the main parts of the Render Scene options. The render menu can be found by clicking Render>Rendering on the topmost main toolbar...GO
Assign Renderer in 3d Studio Max

In 3d Studio Max select Rendering > Render or press F10...GO
Rendering Half Wire and Half Solid

Brazil Rendering Setup

The key to this tutorial is to help you improve your scenes and how you render in general. It is a fairly simple concept that once you learn you will always use.
Assign Renderer in 3d Studio Max
In 3d Studio Max select Rendering > Render or press F10...GO
Rendering Half Wire and Half Solid
- Open 3ds max and draw 2 planes, plane1 and plane2 having same height, width and segments unit.
- Place both planes at same position so that they overlap eachother and looks single rather than 2 planes, let we place at origin...GO
Brazil Rendering Setup
The key to this tutorial is to help you improve your scenes and how you render in general. It is a fairly simple concept that once you learn you will always use.
Ok for today's tutorial I will be showing you how to setup your scene for rendering… The first thing you should do is make sure you have everything you want in the scene, obviously, next we will want to open up the Rendering Menu and select Render. Now when the render popup comes up, scroll down to the rollout called Current Renderers...GO
Compositing a 3D rendered object into Video

Compositing a 3D rendered object into Video
This is a very simple tutorial demonstrating how to take 2D video footage and composite a 3D animated object in the scene. I'm not going to go into every specific MAX feature and option used, Instead I'll be concentrating more on the actual process and flow of work and files...GO
Subscribe to:
Posts (Atom)
|
|
|


